Outlook Settings
Outlook is Microsoft's paid email client that typically comes as part of Microsoft Office. While the screen shots used are from the 2010 version, accessing settings for later versions is nearly identical. If you have an earlier version (2003 or 2007), access settings from the TOOLS menu item.
To view the full size image, simply click the thumbnail image on the left side of each step.
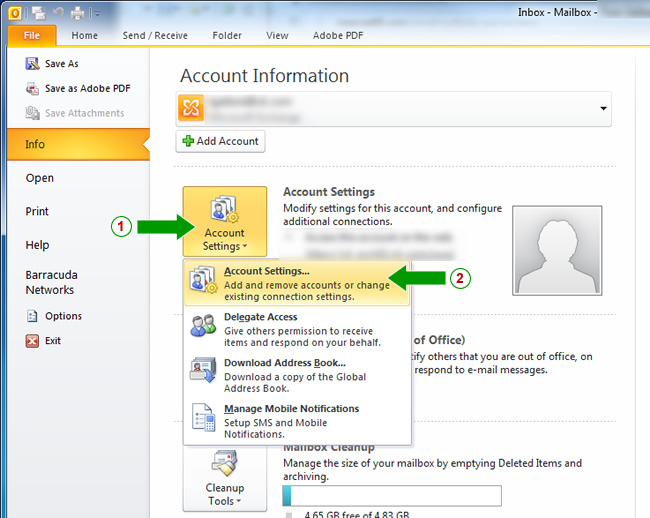
1) With Outlook open, click the FILE tab and then click the icon for ACCOUNT SETTINGS. This will open a drop down menu and you will need to click on ACCOUNT SETTINGS again from there.

2) Next, make sure you have the EMAIL tab selected and the account you wish to edit is highlighted. Then click on CHANGE in the area above the list of email accounts.
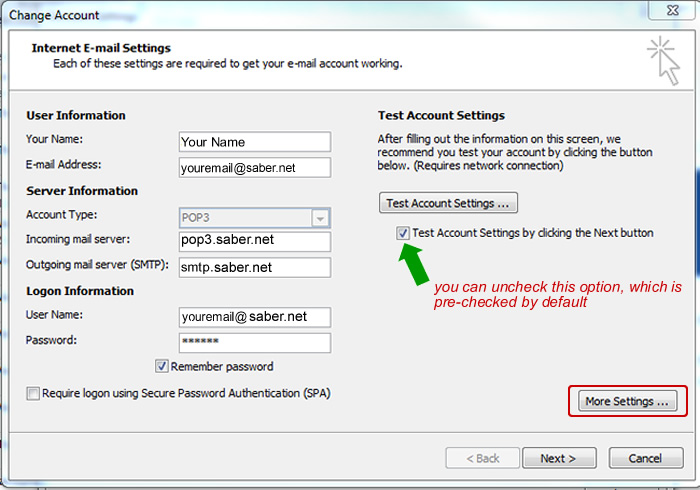
3) On the next screen, verify your settings match the screen shot. Note that Outlook will leave off the portion after the @ sign for the USER NAME so you will need to make sure to fill in your full email address in that spot.
Once you have reviewed the settings and all looks correct, click the MORE SETTINGS button at the bottom right.

4) Once in the MORE SETTINGS window, select the OUTGOING SERVER tab and make sure the first option is checked to require authentication.

5) Still in the same window, click on the ADVANCED tab.
Verify the port numbers for incoming (110) and outgoing server (465) are correct. The outgoing uses SSL so that option should be selected.
Under the DELIVERY section at the bottom, if you have LEAVE A COPY OF MESSAGES ON SERVER selected, you should also check off the option to REMOVE FROM SERVER AFTER xx days (5 to 14 days recommended) so you don't exceed your allowable space on our mail server.
Once you've downloaded mail in Outlook, it's physically on your computer so there is no need to store on the mail server for an extended period.
If all settings look correct, click the OK button to close window and then NEXT and FINISH to get out of settings.